Your first command
A command in CommandRunner is a ModuleScript that returns:
- a table of
Arguments(the schema the plugin uses to build a form), and - a
Runfunction that the plugin calls when you press Execute.
Let's build a tiny one.
1. Add a command
Click the + button at the bottom of the sidebar. A name prompt appears.

Type RecolorSelected and confirm.
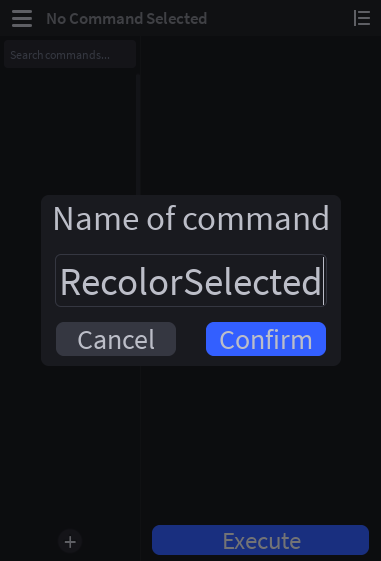
CommandRunner creates a ModuleScript at:
ServerStorage
└── CommandRunnerScripts
    └── RecolorSelected            ← ModuleScript
        └── Types                  ← sibling ModuleScript (auto-generated)
2. Edit the command
The script editor opens automatically with a starter template.
Replace the default body with this:
local Types = require(script.Types)
return {
Arguments = {
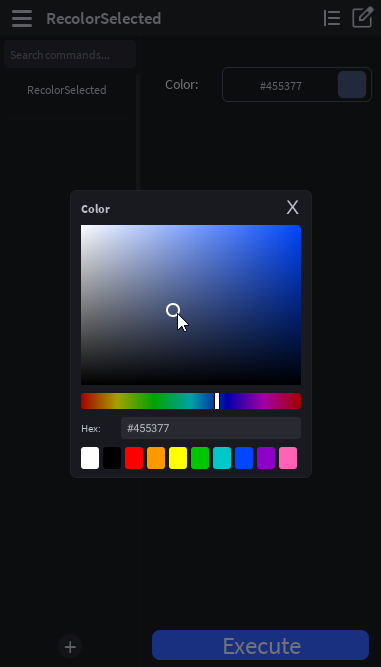
Color = {
Type = "color",
Default = Color3.new(1, 0, 0),
Description = "Color to apply",
},
},
Run = function(props: Types.Props, arguments: Types.ArgumentResult)
for _, object in props.Selected do
if object:IsA("BasePart") then
object.Color = arguments.Color
end
end
end,
}
What's happening:
Arguments.Colordeclares one argument namedColor. The plugin renders it as a color field with the default value being red,Color3.new(1, 0, 0).Runis what fires when you press Execute.props.Selectedis whatever's selected in Studio at the moment you press the button.arguments.Coloris the pickedColor3— typed automatically thanks to theTypes.ArgumentResultannotation.- Everything inside
Runis wrapped in a singleChangeHistoryServicerecording. One Ctrl+Z undoes the whole thing.
Save the script (Ctrl+S) so the plugin picks up your changes and rebuilds the argument form.
3. Run it
In Studio, select a part (or a few) in your workspace.
In the CommandRunner widget:
-
Click
RecolorSelectedin the sidebar (it's already selected if you just created it). -
Click the color swatch next to Color and pick whatever color you want.
-
Click Execute. The selected parts will be recolored.
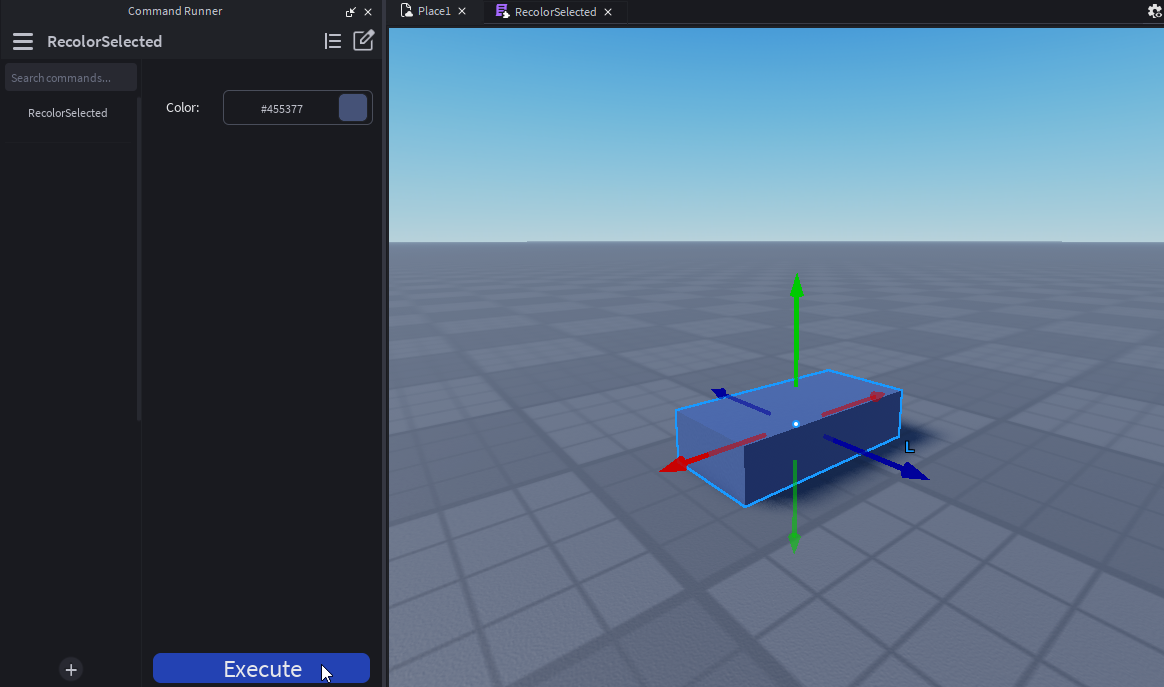
If you want to revert, press Ctrl+Z and they revert in one step.
4. What just happened
Two things to internalize:
- Arguments persist. The value you picked is stored as an attribute on the ModuleScript itself, so it survives closing and reopening Studio. That also means the value is shared with any teammates collaborating in the same place — if you want per-user values, give each person their own copy of the command.
props.Selectedis captured at click-time. Selection inside Studio can change, but for the duration of one execution, the snapshot is stable.
Next steps
- Read the command structure for the full module shape,
OnExecuted,AutoRecordChanges,Tags, and friends. - Browse argument types for everything beyond
string,number,switch,dropdown,instance,paragraph, and more. - Skim the props table to see what else you can do besides reading the selection: frame the camera, swap the active selection, run another command, show a notification.